Office Chair Overhaul: Re-do
After finishing the original office chair overhaul (Part 1 & Part 2), I had some major design regret. In fact, I threw the second chair away, and eventually came to absolutely hate the one I had attempted to upcycle.
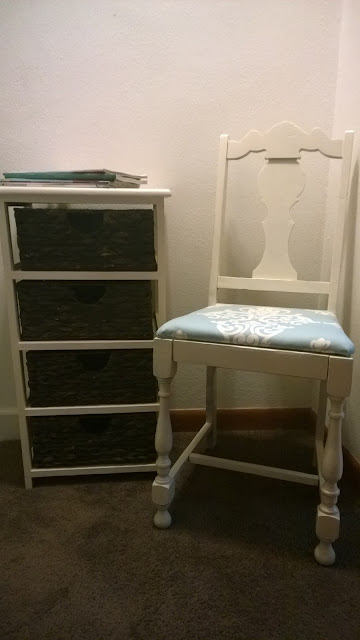


It is far too tiny for any adult sized human. The seat is about 3/4 the size of your butt, it feels like you're sitting a foot off of the ground, and just generally is uncomfortable. At least for adults; if I had kids, they could use it to play house or sit at a table to draw with no problem.
Enter Chelsea's kid sister- Happy Birthday Emma! Sure it isn't Hello Kitty, or hot pink, but for a pre-teen just getting to the age of learning about makeup, this will make a great vanity chair. And hopefully she'll like it because, in her eyes, I "made" it for her (she still hasn't been ruined by society, miraculously, and still appreciates things like that).
Now the problem was that I was down to one office chair again. Not a crisis right now (the office looks more like a messy teen's room- clothing, crafty crap, and 8 million other things everywhere that they don't belong), but something that I eventually wanted to fix. I wasn't actively looking for a replacement, as a) clearly I needed more crafty weirdness (not to mention furniture) like I needed a hole in the head, and b) I have so many other projects that I want to get started/working on/finished.
But the universe had a different plan, and sent me out to dinner with Chelsea (and her SUV), where, on our way there, I saw two lonely dining room chairs hanging out with some power lines, grape vines, and a storage unit. Weird, right? I decided that if they were still there after we had gone to dinner, that "alright, I guess I'll pick them up."
Well....


Okay, so they definitely are not the prettiest things in the world. In fact, they're pretty freaking hideous. For whatever reason, I imagine that in their past life, they lived in a jam-packed house full of slobbery dogs, wood paneling, and a grumpy old Russian dude. Don't ask me why, I have no clue.

And what in the world is that fabric??? Blech!
Home they came, to get a new life forced onto them. This one won't include slobbery dogs, or any grumpy old Russian men. Wood paneling? Well, at least our is painted and only in the basement, I guess.
Here's the size comparison before I threw the second tiny chair away. Now it looks even more dinky! Fit for the Keebler elf, maybe, but never my butt.


These guys sat here for about 4 days before I finally made the decision to get started (a.k.a. Aaron wanted to grill and needed access to the back yard, so they needed to be moved away from the door).
I chose grey for the main color (of course). In fact, I actually had enough stocked up for both chairs, so I didn't even have to spend any money on it. So far, this project hasn't costed a dime! Now that is a victory if you ask me.
First things first- gotta take the seat off before anything else. Just flip the chair over, check out what kind of screw-heads are there, and grab a screwdriver. Then pop the seat off and you're ready to go.


Sorry, had to show the fabric again. There's just so much wrong with it.
- It feels gross. And not just a worn-in, had too many butts on it gross. Gross in the sense that this was not meant to be an upholstery fabric. It's almost fuzzy, like a chenile fabric. No thanks- can you imagine trying to spot clean chenile from a gravy stain or grease stain? Fail.
- It's ugly. And not only is it ugly, but it's seasonal. Are we supposed to have cornucopias just chilling out all year round? No. No we are not. Harvest season is only near the fall.
- It doesn't even come close to complementing the ornate chair back. In fact, it takes away from it. Once you see the fabric, you don't even remember the back being anything funky or unique.
So it's fully established- the fabric needs to go. Far, far away. I plan on using a solid upholstery fabric, and adding some extra foam cushion to amp these up.
But first, paint. I laid out a drop cloth on the lawn while Aaron grilled, weirded out passerby and neighbors alike, and busted out the primer.
The backs of the chairs are not even close to being wood. They look like wood, but are absolutely 100% plastic. Primer would definitely be a good idea to ensure that the paint would stick.

After a quick coat of primer, I put a coat of regular paint over what parts of the chair were exposed. Holy cow, what a difference a coat of paint can make. These still aren't the prettiest chairs in the world, but they look a heck of a lot better with a fresh coat of color. They no longer look beat up and dingy (yay!), and they look a lot newer than they are.

While I was painting this first one, the paint brought out an interesting little detail on the underside! Not sure if this is the maker of the chair, or the original owner, or what. Either person would probably hate me with a burning passion for a) insulting the fabric choice at length and b) for painting these. So sorry, Frank. So, so sorry. But at least they aren't abandoned on the side of the road anymore.
 |
| "Frank O. Ozier 320-10-4193" |
After I finished getting the paint on the first chair, I laid the second chair down on the cloth and repeated. The carving is listed on the second chair as well, only flipped upside down.

It was only after I had laid the second chair down that I could really appreciate the difference the paint had actually made on these chairs. This update was much needed, and that fact became very apparent very quickly when you put them side by side.
This picture really doesn't do this justice. In fact, I'd almost say that the right chair looks better than the left in this picture. Unfortunately, my camera didn't quite pick up on the missing chunks, the gouges, and how awful and worn the plastic had started to look over the years.

After the coats of paint had dried on both chairs (about a half hour later), it had started to get dark rapidly. I would have to move quickly to cover the other side of the chair tonight. Using the flashlight on my phone, I tried my best to cover the entire second side of each chair as the sun set and the grass began to accumulate dew.
By the time the chairs were dry, it was pitch black outside- oops. Guess we'll hope for the best and fix it later.
Overall, I didn't miss too many spots, but I would like to put a full second coat on anyways, so the spots I did miss won't be naked for long. Right now they're spotty buttless frames, but once I decide on a color for the upholstery, these bad boys will be finished in no time (unlike the rocking chair, which sadly still has not received its new cushion- I haven't decided on a fabric officially for that yet either, so maybe I'll do all three in one day? But only maybe, don't hold me to that statement)!

So what do you guys think? Should I look for a grey fabric that's lighter than the paint and go with a monochromatic scheme? Maybe a darker grey? Or should I go with a strong navy blue, or a deep royal blue? Let me know by voting on the Facebook page, and we'll see what I end up with!


After paint the chairs have been made better, now they are looking like new. You must immediately pick up a paintbrush if you want to modify the appearance and comfort of your office furniture. It's commonly believed that painting is the quickest and least expensive approach to remodel any space. After painting, you have a unique office chair in the color and shape of your choice that almost cost nothing.
ReplyDeleteLuckily, many of the most common office chair issues can be fixed with a bit of elbow grease, your home tool kit and some office chair spare parts. When you want to change the color of an office chair, the easiest way is using spray paint. Since the bottom of my chair was mostly plastic I used Rust-Oleum spray paint for plastic. It has a subtle sheen and I am very happy with how it adhered and covered.
ReplyDelete