Faking It: Faux Apothecary Cabinet for $30
I have a confession to make. I actually kind of hate how this project turned out. A LOT. There are a lot of imperfections I can't stop focusing on, and it just ruins the piece for me. It is growing on me, but I'm still not a super fan. It's one of those "looks good from far away, but not so good up close" projects.
A long while ago, I purchased this junky little trash cabinet for $3 to use for paint/tool storage. It sat unused for quite some time, neglected & beat up.
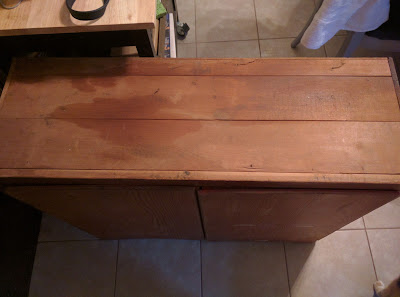


I didn't really have an idea of what I wanted to do to it to "fix it up" since it wasn't going to be used for anything pristine. Plus there was this weirdo thing happening with the top shelf that I had no explanation for, and no motivation to fix (super lazy).

That was, until I saw this beautiful beast.

And this one.

And these guys.

Can you believe that two of those are DIY and one of them costs $800-1500 at Pottery Barn (my least favorite of the three)?! I definitely do not have that kind of dough to spend, especially on a piece of furniture that was going to be used for messy art & DIY supplies.
They inspired me to try to make an apothecary style cabinet, using the same method that Lauren used to create the look of her beautiful piece (you can check that all out here if you're going to try your own version).
I went to Home Depot, gathered all my supplies for about $25, and broke out the jig saw (which was really intimating, loud, and messy).


By the end of all of the sawing, liquid nailing, & clamping, I had a set of very unfortunate looking doors. I was not all that sure that this was going to work at all.
I couldn't cut a straight line in this thing plywood to save my life, and I wasn't about to go to Home Depot at 11pm to get a new piece when ultimately, I wouldn't be losing out on much money if this turned out like crap.

But I persevered, & after a few coats of stain, some new legs, and some hardware, I don't think this $30 project turned out too horrifically (though it definitely could be better).

I might still use it for paint & tools, and eventually I might replace the weird shelf thing happening there, but right now, I can deal with it!
There are some imperfections in the stain that need to be fixed, & I am waiting on the final cup pull to show up in the mail, so ignore the one drilled hole with no handle ;) I also need to figure out how to line the screw up on the top left cup, because it keeps falling sideways.


I had most of the hardware & the stain on hand, so I'm not factoring it into my cost, but even with them factored in, this little guy cost less than $100- much better than the $800-1500 Pottery Barn version at the beginning of this post!


Overall, this project was an experimental learning process. It may not look perfect by any means, but it'll work for what I need it to do. And the next time I decide to try something like this, I'll have a little experience under my belt.
So while it definitely wasn't my best work, I suppose I can deal with it until I find another piece of junky cabinetry to destroy maliciously. I'm not sure what I'll do with the red side of the doors yet; I did think about mod-podging some old school charts to the inside, but the screws stick out a little too much to do that. They'll probably just be painted to disguise the red at some point.


Next on the project list is finishing up these chairs & starting in on the settee (still really nervous that I'll destroy that too).


I'll see you soon!

A long while ago, I purchased this junky little trash cabinet for $3 to use for paint/tool storage. It sat unused for quite some time, neglected & beat up.


That was, until I saw this beautiful beast.

And this one.

And these guys.

Can you believe that two of those are DIY and one of them costs $800-1500 at Pottery Barn (my least favorite of the three)?! I definitely do not have that kind of dough to spend, especially on a piece of furniture that was going to be used for messy art & DIY supplies.
They inspired me to try to make an apothecary style cabinet, using the same method that Lauren used to create the look of her beautiful piece (you can check that all out here if you're going to try your own version).
I went to Home Depot, gathered all my supplies for about $25, and broke out the jig saw (which was really intimating, loud, and messy).


By the end of all of the sawing, liquid nailing, & clamping, I had a set of very unfortunate looking doors. I was not all that sure that this was going to work at all.
I couldn't cut a straight line in this thing plywood to save my life, and I wasn't about to go to Home Depot at 11pm to get a new piece when ultimately, I wouldn't be losing out on much money if this turned out like crap.

But I persevered, & after a few coats of stain, some new legs, and some hardware, I don't think this $30 project turned out too horrifically (though it definitely could be better).

I might still use it for paint & tools, and eventually I might replace the weird shelf thing happening there, but right now, I can deal with it!
There are some imperfections in the stain that need to be fixed, & I am waiting on the final cup pull to show up in the mail, so ignore the one drilled hole with no handle ;) I also need to figure out how to line the screw up on the top left cup, because it keeps falling sideways.


I had most of the hardware & the stain on hand, so I'm not factoring it into my cost, but even with them factored in, this little guy cost less than $100- much better than the $800-1500 Pottery Barn version at the beginning of this post!


Overall, this project was an experimental learning process. It may not look perfect by any means, but it'll work for what I need it to do. And the next time I decide to try something like this, I'll have a little experience under my belt.
So while it definitely wasn't my best work, I suppose I can deal with it until I find another piece of junky cabinetry to destroy maliciously. I'm not sure what I'll do with the red side of the doors yet; I did think about mod-podging some old school charts to the inside, but the screws stick out a little too much to do that. They'll probably just be painted to disguise the red at some point.


Next on the project list is finishing up these chairs & starting in on the settee (still really nervous that I'll destroy that too).


I'll see you soon!


Comments
Post a Comment